Quantcast
Channel: Airband – rtl-sdr.com
Viewing all 186 articles
Browse latest View live

Receiving ADS-B Jetliner Traffic with a Simple Paper Clip

$
0
0

Over on YouTube user icholakov has uploaded a new video showing how easy it can be to build a cheap ADS-B antenna out of a simple paper clip and coax connector. Modern aircraft carry an ADS-B transceiver and antenna which broadcasts the current GPS location of the aircraft. This is used for collision avoidance and air traffic control, but anyone with a receiver like an RTL-SDR can also receive and decode these signals, and plot locally received air traffic on Google maps. We have a tutorial for decoding ADS-B signals available here.

In the video Thomas Cholakov (N1SPY) explains the concept behind the antenna design, which is a standard 1/4 wave ground plane cut to the correct dimensions for ADS-B at 1090 MHz. He cuts 5 pieces of the same length, with one piece used as the active whip element, and four pieces used in the ground plane element. The paper clip pieces are then soldered onto a coaxial connector and then the antenna is ready to be used.


Creating an Encrypted ADS-B Plane Spotter with a Raspberry Pi, RTL-SDR and SSL

$
0
0

These days it’s quite easy to share your ADS-B reception on the internet with giant worldwide aggregation sites like flightaware.com and flightradar24.com. These sites aggregate received ADS-B plane location data received by RTL-SDR users from all around the world and display it all together on a web based map.

However, what if you don’t want to share your data on these sites but still want to share it over the internet with friends or others without directly revealing your IP address? Some of the team at beame.io have uploaded a post that shows how to use their beame.io service to securely share your ADS-B reception over the internet. Beame.io appears to be a service that can be used to expose local network applications to the internet via secure HTTPS tunneling. Essentially this can allow someone to connect to a service on your PC (e.g. ADS-B mapping), without you revealing your public IP address and therefore exposing your PC to hacking.

On their post they show how to set up the RTL-SDR compatible dump1090 ADS-B decoder on a Raspberry Pi, and then connect it to their beame-instal-ssl service.

Encrypted ADS-B Sharing with the beame.io service.

HamRadio360 Podcast: ADS-B Aircraft Tracking with an RTL-SDR

$
0
0

HamRadio360 is a bi-weekly podcast all about ham radio and related topics. On their June 13 podcast Nick, KK6LHR came on to discuss his experiences with decoding ADS-B with cheap SDR radio like the RTL-SDR. In the podcast they talk about the history of ADS-B, what it is, the difference between the 1090 MHz and 978 MHz frequencies, what all of the terms and acronyms mean, feeding sites like flightaware and flightradar24 and of course how to decode it with various forms of software packages.

Part of Nick's ADS-B Setup
Part of Nick’s ADS-B Setup

Akos’ ADS-B Performance Comparison of 19 Different RTL-SDR Dongles

$
0
0

Over on his blog radioforeveryone.com author Akos has run a large comparative test of 19 different types and brands of RTL-SDR dongles on ADS-B reception. He takes multiple dongles from NooElecs Nano/Mini and SMArt range and our RTL-SDR Blog V3 unit and the FlightAware ADS-B optimized units. He also notes that E4000 based dongles such as the NooElec XTR are unable to receive ADS-B frequencies and excludes them from the test.

For his tests he used a Raspberry Pi 3 and compares two dongles at a time. The results are about as would be predicted. The tiny Nano dongles are usually the worst performers due to their trade off in size vs heat dissipation and internally generated noise. The standard sized dongles all perform about the same, but the dongles with heatsinking perform the best. Of course the FlightAware dongles still get the best ADS-B reception due to their significantly lower noise figure thanks to the built in ADS-B LNA.

One interesting finding is that Akos shows that heat does play a noticeable role in performance of these dongles at 1090 MHz. Akos noticed that the better heatsinking on the RTL-SDR Blog V3 or cooler days improved reception.

Some of the tested RTL-SDR dongles

Visualizing the Traveled Path of a Weather Balloon, Tanker Boat and Gliders with an RTL-SDR and CesiumJS

$
0
0

Over on YouTube user pascal poulain has uploaded a short video that shows a timelapse of the flight path of a weather balloon in Cesiumjs as it rises and falls, as well as a time lapse of a marine tanker docking, with the signals received with an RTL-SDR. In a third video pascal also shows a visualization of glider flights tracked via FLARM and the Open Glider Network which also obtains most of it’s data through RTL-SDR contributors.

Cesiumjs is a tool similar to Google Earth. The main difference is that it works on a wider array of devices through a web browser without the need for any plugins. It is often used for visualizing data on the globe. An example of some of its many demos can be found here.

We’re not sure what tools pascal used, but over on GitHub there is a tool called airtrack which can be used together with dump1090 to display flights in real time on Cesiumjs.

Showing what VOR and ILS Aviation Signals Look like in SDR#

$
0
0

Over on YouTube user RedWhiteandPew has uploaded two videos showing what VOR and ILS signals look like in SDR# with an RTL-SDR dongle. VOR and ILS are both radio signals used for navigation in aviation. 

VOR stands for VHF Omnidirectional Range and is a way to help aircraft navigate by using fixed ground based beacons. The beacons are specially designed in such a way that the aircraft can use the beacon to determine a bearing towards the VOR transmitter. VOR beacons are found between 108 MHz and 117.95 MHz.

RedWhiteandPew writes:

Here I am picking up the VOR beacon from KSJC. The coolest part is at the end of the video. I believe the signal moving back and forth is caused by the Doppler effect, because VORs transmit their signals in a circular pattern. The VOR wiki article has a GIF that shows how it works here https://en.wikipedia.org/wiki/VHF_omn…. If you play and pause the video at different points before I zoom in, you can see that the two signals on the side are the opposite phase.

ILS stands for Instrument Landing System and is a radio system that enables aircraft to land on a runway safely even without visual contact. It works by using highly directional antennas to create four directional lobes (two in the horizontal plane, two in the vertical) that are used to try and ensure the aircraft is centered and leveled on the approach correctly. The ILS frequencies are at 108.1 – 111.95 MHz for the horizontal ‘localizer’, and at 329.15-335.0 MHz for the vertical ‘glide slope’.

RedWhiteandPew writes:

Here I have tuned into one of KSJC’s ILS frequencies. You are able to hear the faint identifier beeping transmitting its ISL ID code which is ISJC. For comparison, I used to morse code translator website.

The reason I am hearing ISJC and not ISLV even though they are on the same frequency is because the localizers transmitting the signal are directional along the length of the runway. Since I am located to the south east of the airport, and I am within its transmitting beam, I am able to listen to it on a scanner.

If you’re interested in these signals then this previous post about actually decoding them might be of interest to you.

RadioForEveryone New Posts: Antenna Weatherproofing, NooElec Nano 3 Review, ADS-B Antenna Shootout

$
0
0

Over on his blog 'Radio for Everyone' author Akos has uploaded three new posts. The first shows how to cheaply weatherproof antenna connections by wrapping electrical/plumbing tape around the connection. He shows and example with the FlightAware ADS-B antenna.

The second post is a review of the relatively new NooElec Nano 3, which is a small form factor RTL-SDR that comes with a TCXO and metal case. Akos shows how the form factor is good for using it with Mobile phones. Akos opens the unit up and shows us how the unit is sandwiched inside the metal case with two thermal pads for improved heat dissipation. Later in the review he also discusses the MCX connector, TCXO and heat.

The third post compares three commercially sold antennas at ADS-B reception. The compared antennas are the FlightAware ($45) and Jetvision ($90) ADS-B antennas as well as our RTL-SDR Blog general purpose dipole ($10). The results show that the Jetvision antenna performs the best followed by the FlightAware and then the dipole. However we note that Akos has incorrectly used the dipole as he did not orient it as a vertical dipole.

Radio For Everyone: Nano 3 Size Comparison

The post RadioForEveryone New Posts: Antenna Weatherproofing, NooElec Nano 3 Review, ADS-B Antenna Shootout appeared first on rtl-sdr.com.

Outernet Dreamcatcher Setup with ADS-B dump1090 and PiAware Tutorial

$
0
0

The Outernet Dreamcatcher is a single board PC with a built in RTL-SDR. It has a TCXO and two SMA ports, one being amplified and filtered for L-band applications and the other being a regular port for all other applications.

With built in computing hardware the Dreamcatcher can be used as a standalone unit for various applications. As the Dreamcatcher is now on sale we've decided to create a brief tutorial that shows how to set one up as a cheap ADS-B aircraft radar receiver, and also how to set it up as a PiAware feeder. PiAware is software that allows you to feed FlightAware.com which is an ADS-B aggregatpr.

Any simple SMA antenna can be used, like our Dipole kit, an old RTL-SDR whip antenna, or even a short piece of wire.

We also have a previous review of the Dreamcatcher available here. In the past the main problem with the $59 USD Dreamcatcher was that you could get a more powerful Raspberry Pi 3 and RTL-SDR dongle for a similar price. But now at the sale price of $39 USD the Dreamcatcher is definitely a great deal.

Note that we'd recommend NOT purchasing the Dreamcatcher specifically for the Outernet data signal as we're unsure exactly how long that signal will continue to be broadcasting for. 

The Outernet Dreamcatcher

What follows below is a tutorial that shows how to set up a Dreamcatcher. The tutorial installs dump1090 at the same time, but afterwards could be used for a number of other applications.

Dreamcatcher Setup (via Windows) with dump1090

Setting up the Dreamcatcher requires working with the terminal, but this is fairly simple. You'll need an 8GB or larger micro SD card.

  1. First download the latest Dreamcatcher Armbian Image. The image comes as a .gz file, so you'll need to use an extraction program like 7zip to extract the .img file if you are on Windows.
     
  2. Plug the SD card into your PC. If on Windows, using Win32 Disk Imager burn the .img file to the SD card. Make sure to select the drive that your SD card is assigned to (in this case E:\). Press 'Write' to write the image to the SD card.
      
  3. Insert the SD Card into the middle SD card slot on the Dreamcatcher (labelled SD0)
     
     
  4. Using a microUSB cable, connect the Dreamcatcher to your PC using the USB_OTG port. (It's the center microUSB port on the Dreamcatcher). This will power the dreamcatcher and provide a way to communicate to it. A few second after plugging it in you should hear the Windows USB connection sound.
      
  5. Open up Device Manager (hit the start menu and type Device Manager). Under 'Serial' check what port number your Dreamcatcher is using. It will be under the name 'PI USB to Serial'. For example in the image below the COM port is COM9.
      
  6. Open PuTTY and select Serial. Edit the COM port to the COM port number shown in device manager and set the baud rate to 115200. Press Open. For example in the image below we had COM9.

     
  7. Once you connect you'll be asked to login in the terminal window. The default username/password is 'root/1234'. After entering the login you'll be asked to reenter the original password and then update the password and create a new user account. Simply follow the prompts here.

     
  8. First make sure that the included EDUP WiFi dongle is plugged into the Dreamcatcher. You can now connect to your WiFi by entering 'nmtui' into the terminal. This will bring up a text GUI. Using the keyboard select 'Activate a connection'. Then find your WiFi access point name, navigate to us, press enter and then enter the password. After connecting go across to Quit.
      
  9. Install the RTL-SDR drivers and dump1090 by using the following commands.
    sudo apt update 
    sudo apt install rtl-sdr librtlsdr-dev pkg-config build-essential 
     
    mkdir adsb 
    cd adsb 
    git clone https://github.com/MalcolmRobb/dump1090 
    cd dump1090 
    make
  10. In the terminal run 'ifconfig' and look for the wlan0 IP address. Write this IP address down.

      
  11. Now still in the adsb/dump1090 directory you can start dump1090 with the following commands.
    ./dump1090 --interactive --net
  12. On another PC on your network you can use a web browser to connect to http://IP_ADDR:8080, where IP_ADDR should be replaced with your wlan0 IP address. This will show the dump1090 GUI and map.
     
  13. Connect an antenna to the LNA_BYPASS SMA port, which is the SMA port closest to the SD card. This port is enabled by default.

If you are interested in further documentation, then radionerds.com have created a very good Wiki that documents all the Dreamcatcher features and commands. Outernet also have official text tutorials available at docs.outernet.is.

PiAware

FlightAware.com is a company that aggregates ADS-B data from various sources. A good majority of data comes from volunteers who run RTL-SDR + Raspberry Pi based feeding systems. If you regularly contribute data to FlightAware you gain access to a free Enteprise account which normally costs $89.95. With an Enterprise account you can get various upgrades to the site such as access to historical data of up to 8 months, more flights per page, fleet tracking, no ads and more.

FlightAwares Raspberry Pi software is called PiAware. We tested PiAware on the Dreamcatcher and found that it runs well. The install procedure is exactly the same as what is written on their website for the Raspberry Pi. Simply follow their steps and you should have a PiAware system running in no time.

Be aware that once installed PiAware will start automatically whenever the Dreamcatcher boots, so the Dreamcatcher will become a dedicated PiAware feeder.

ADS-B Performance

Compared to a V3 the Dreamcatcher's performance/sensitivity at 1090 MHz is identical if not slightly better. The Dreamcatcher has an RF front end optimized for L-band frequencies so this makes sense. Below is a screenshot of 10 minute ADS-B test counting the number of messages received between the two dongles connected to the same antenna via a splitter.

ADS-B Messages Received. DC vs V3 on same antenna via splitter.

The post Outernet Dreamcatcher Setup with ADS-B dump1090 and PiAware Tutorial appeared first on rtl-sdr.com.


A High Performance RTL-SDR ADS-B Receiver Build Guide

$
0
0
ADS-B Setup in an outdoor enclosure. Includes FlightAware ADS-B Antenna, FlightAware RTL-SDR Dongle, Raspberry Pi, POE Splitter.

Over on Imgur and Reddit user Mavericknos has uploaded a very nice pictorial guide where he shows how he's built a high performance RTL-SDR based ADS-B receiver that can be mounted outside in a waterproof enclosure.

He uses a FlightAware dongle, which is an RTL-SDR optimized for best ADS-B reception when placed directly at the mast/antenna. For an antenna he uses the FlightAware ADS-B antenna, which we've reviewed in the past and found to be one of the best value ADS-B antennas available on the market. To process the data, a Raspberry Pi is used and it is powered via power over Ethernet (POE). If you didn't already know, power over Ethernet (not to be confused with Ethernet over powerline) is simply running power through unused wires inside an Ethernet cable. It is a convenient method of powering remote devices and giving them a network connection at the same time. The whole package is enclosed in a waterproof case, and the antenna attached to the top.

Putting the RTL-SDR and computing device at the antenna removes any loss from long coax runs, and the POE connection provides a tidy cabling scheme. The FlightAware dongle is a good choice for mounting directly at the mast or antenna because it has a built in low noise figure LNA. If using coax cabling instead, and keeping the RTL-SDR and Raspberry Pi inside, then it would be better to mount an LNA at the mast and power it through the coax via a bias tee.

All components in the build.


The post A High Performance RTL-SDR ADS-B Receiver Build Guide appeared first on rtl-sdr.com.

Tom’s Radio Room Tests and Reviews the RTL-SDR Blog Multipurpose Dipole Kit

$
0
0

Over on his YouTube channel Tom Stiles (hamrad88) has been experimenting with and reviewing our multipurpose dipole kit. Tom is a ham radio YouTuber who runs a show that produces content often, so we encourage you to subcribe to his channel if you're interested. Tom reviewed our dipole kit over a series of 5 videos which we link here [1: Discussing the product], [2: Unboxing], [3: First ADS-B Tests], [4: Second ADS-B Tests], [5: Third ADS-B Tests]. We post have embedded video 2 and 5 below.

In his testing Tom finds that using the antenna in the vertical orientation improves ADS-B performance. This is expected as ADS-B signals are vertically polarized, and so the antenna should be too. By using the included suction cup mount Tom is able to get the antenna attached to his window which improves reception by getting the antenna as close to the outdoors as possible. This is an expected use case for the antenna, and it's good to see that good results are being had!

If you're interested in the set please see our store at www.rtl-sdr.com/store, or use the links provided in Tom's videos. We also have a tutorial and use case demonstrations for our dipole kit available at www.rtl-sdr.com/DIPOLE.

The post Tom’s Radio Room Tests and Reviews the RTL-SDR Blog Multipurpose Dipole Kit appeared first on rtl-sdr.com.

New Product: RTL-SDR Blog 1090 MHz ADS-B LNA

$
0
0

We're happy to announce the release of our new high performance low noise amplifier (LNA) for improving 1090 MHz ADS-B reception. The LNA uses a low noise figure high linearity two stage MGA-13116 amplifier chip and three stages of filtering to ensure that strong signals or interference will not overload either the amplifier or SDR dongle.

The LNA is currently only available from our Chinese warehouse, and costs US$24.95 including shipping. Please note that the price may increase slightly in the future, and that Amazon USA may not be stocked until March.

Click here to visit our store

RTLBlog_LNA_Product_Flat
RTLBlog_LNA_Product_PCB_Flat

An LNA can help improve ADS-B reception by reducing the noise figure of the system and by helping to overcome losses in the coax cable and/or any other components such as switches and connector in the signal path. To get the best performance from an LNA, the LNA needs to be positioned close to the antenna, before the coax to the radio.

The gain of the RTL-SDR Blog ADS-B LNA is 27 dB's at 1090 MHz, and out of band signals are reduced by at least 60 - 80 dB's. Attenuation in the broadcast FM band and below 800 MHz is actually closer to over 100 dB's. In the LNA signal path there is first a low insertion loss high pass filter that reduces the strength of any broadcast FM, TV, pager or other similar signals that are usually extremely strong. Then in between the first and second stage of the LNA is a SAW filter tuned for 1090 MHz. A second SAW filter sits on the output of the LNA. The result is that strong out of band signals are significantly blocked, yet the LNA remains effective at 1090 MHz with a low ~1 dB noise figure.

The LNA is also protected against ESD damage with a gas discharge tube and low capacitance ESD diode. But please always remember that your antenna must also be properly grounded to prevent ESD damage.

Finally please note that this LNA requires bias tee power to work. Bias tee power is when the DC power comes through the coax cable. The RTL-SDR V3 has bias tee power built into it and this can be activated in software. See the V3 users guide for information on how to activate it. Alternatively if you don't own a dongle with bias tee built in, then an external bias tee can be used and those can be found fairly cheaply on eBay. Finally, if you are confident with soldering SMT components, then there are also pads and a 0 Ohm resistor slot on the PCB to install an LDO and power the LNA directly.

Specification Summary:

  • Frequency: 1090 MHz
  • Gain: 27 dB @ 1090 MHz
  • Return Loss: -16 dB @ 1090 MHz (SWR = 1.377)
  • Noise Figure: ~1 dB
  • Out of band attenuation: More than 60 dB
  • ESD Protection: Dual with GDT and ESD Diode
  • Power: 3.3 - 5V via bias tee only, 150 mA current draw
  • Enclosure: Aluminum enclosure
  • Connectors: Two SMA Female (Male to Male adapter included)

Dimensions:

46.5 x 32 x 15.6 mm (not including the SMA).
Including the SMA the length is 69.8 mm.

Testing

We tested our new LNA against another ADS-B LNA with filter built in that is sold by another company and the FlightAware Prostick+ dongle in an environment with strong out of band signals such as pagers, broadcast FM, DVB-T and GSM signals. The results showed that the RTL-SDR Blog ADS-B LNA gathered the most ADS-B packets. In the tests both LNA's were connected on the receiver side to be fair to the FA dongle. Improved performance could be achieved by moving the LNA to the antenna side.

Other ADS-B LNA vs RTL-SDR Blog ADS-B LNA Received Messages
FlightAware Prostick+ vs RTL-SDR Blog ADS-B LNA Received Messages

Checking in SDR# for out of band signals also showed that the RTL-SDR Blog ADS-B LNA significantly reduces those strong out of band signals, whereas the others have trouble blocking them out. Below we show the results as well as some measurements.

RTL Blog ADS-B LNA @ 1090 MHz

RTL Blog ADS-B LNA @ 1090 MHz

Other ADS-B LNA @ 1090 MHz

Other ADS-B LNA @ 1090 MHz

FlightAware Prostick+ @ 1090 MHz

FlightAware Prostick+ @ 1090 MHz

RTL Blog ADS-B LNA tuned to Broadcast FM

RTL Blog ADS-B LNA tuned to Broadcast FM

Other ADS-B LNA tuned to Broadcast FM

Other ADS-B LNA tuned to Broadcast FM

FlightAware Protstick+ tuned to Broadcast FM

FlightAware Protstick+ tuned to Broadcast FM

RTL Blog ADS-B LNA tuned to a DVB-T Signal

RTL Blog ADS-B LNA tuned to a DVB-T Signal

Other ADS-B LNA tuned to a DVB-T Signal

Other ADS-B LNA tuned to a DVB-T Signal

FlightAware Prostick+ tuned to a DVB-T Signal

FlightAware Prostick+ tuned to a DVB-T Signal

RTL Blog ADS-B LNA tuned to a GSM Signal

RTL Blog ADS-B LNA tuned to a GSM Signal

Other ADS-B LNA tuned to a GSM Signal

Other ADS-B LNA tuned to a GSM Signal

FlightAware Prostick+ tuned to a GSM Signal

FlightAware Prostick+ tuned to a GSM Signal

Gain Measurements

Gain Measurements

Return Loss

Return Loss

Simulated Gain/Attenuation

Simulated Gain/Attenuation

Conclusion

This RTL-SDR Blog ADS-B LNA can significantly improve ADS-B reception, especially if you are in an environment with strong out of band signals. Even if you are not, the low noise figure design will improve reception regardless.

The post New Product: RTL-SDR Blog 1090 MHz ADS-B LNA appeared first on rtl-sdr.com.

Running a NAS, Torrentbox and ADS-B RTL-SDR Server all on the same Raspberry Pi 3

$
0
0

Most readers are familiar with the Raspberry Pi 3 and how it can be used with RTL-SDR applications such as ADS-B reception. However, one does not need to dedicate an entire Pi 3 to a single task as they are more than powerful enough to run multiple applications at once.

Over on his blog 'Radio for Everyone' Akos has uploaded a tutorial that shows how he set his Raspberry Pi 3 up as a simultaneous Network Attached Storage (NAS), Torrentbox  and ADS-B server. A NAS is simply a hard drive or other data storage device that can be accessed easily over a network instead of having to be connected directly to a PC. A torrentbox is a device such as a Raspberry Pi 3 running torrent software so that you can download torrent files 24/7 without needing a PC on all the time.

Akos' tutorial shows how to set everything up from scratch, starting from writing the Raspbian SD Card and connecting to it via SSH. He then goes on to show how to install the torrent software, set up the NAS and finally set up ADS-B reception.

Pi 3 as a NAS, torrentbox and ADS-B server.

The post Running a NAS, Torrentbox and ADS-B RTL-SDR Server all on the same Raspberry Pi 3 appeared first on rtl-sdr.com.

RTLSDR-Airband V3 Released

$
0
0

Thanks to RTL-SDR.com reader Lee Donaghy for writing in and little us know that RTLSDR-Airband was recently updated to include SoapySDR support. This allows the software to now work with almost any SDR including the RTL-SDR, Airspy, SDRplay, HackRF, LimeSDR and more. They have also removed the 8-channels per device limitation and applied various bug fixes too. The full changelog is posted at the end of this post.

RTLSDR-Airband is a Linux based command line tool that allows you to simultaneously monitor multiple AM or FM channels per SDR within the same chunk of bandwidth. It is great for monitoring narrowband communications such as aircraft control and can be used to feed websites like liveatc.net, or for use with a Icecast server, or simply for continuously recording multiple channels to an MP3 file locally. It is also very useful for those running on low powered computing hardware who want software that uses less CPU power than a full GUI program like GQRX or CubicSDR.

Version 3.0.0 (Feb 10, 2018):

  • Major overhaul of the SDR input code - now it's modular and hardware-agnostic (no longer tightly coupled with librtlsdr).
  • Support for SoapySDR vendor-neutral SDR library - any SDR which has a plugin for SoapySDR shall now work in RTLSDR-Airband.
  • Support for Mirics DVB-T dongles via libmirisdr-4 library.
  • Support for RTLSDR is now optional and can be disabled at compilation stage.
  • Removed the 8-channels-per-device limit in multichannel mode.
  • Configurable per-device sampling rate.
  • Configurable FFT size.
  • Support for multibyte input samples.
  • Support for rawfile outputs (ie. writing raw I/Q data from a narrowband channel to a file for processing with other programs, line GNUradio or csdr).
  • INCOMPATIBLE CHANGE: removed rtlsdr_buffers global configuration option; buffer count can now be adjusted with a per-device "buffers" option.
  • INCOMPATIBLE CHANGE: removed syslog global configuration option; syslog logging is now enabled by default, both in foreground and background mode. To force logging to standard error, use -e command line option.
  • Added -F command line option for better cooperation with systemd. Runs the program in foreground, but without textual waterfalls. Together with -e it allows running rtl_airband as a service of type "simple" under systemd. Example rtl_airband.service file has been adjusted to reflect this change.
  • Added type device configuration option. It sets the device type (ie. the input driver which shall be used to talk to the device). "rtlsdr" is assumed as a default type for backward compatibility. If RTLSDR support has been disabled at compilation stage, then there is no default type - it must be set manually, or the program will throw an error on startup.
  • Frequencies in the config can now be expressed in Hz, kHz, MHz or GHz for improved readability.
  • Lots of bugfixes.
  • Rewritten documentation on Github Wiki.

The post RTLSDR-Airband V3 Released appeared first on rtl-sdr.com.

Listening to SELCAL and the HF Air Band with an RTL-SDR

$
0
0

Over on YouTube content creator Tech Minds continues to upload informative RTL-SDR based videos, this time discussing SELCAL and the HF Air Band. For international flights it is common for aircraft to communicate with ground controllers and the parent company via the HF bands.

As radio communications are sparse, and the pilots obviously don't want to monitor noisy HF static for the entirely journey a system is required for signalling pilots when a ground station wishes to communicate with them. The system in use today is SELCAL which simply consists of transmitting a set of tones unique to an aircraft. When a correct SELCAL tone is received the aircraft system alerts the pilots that a radio voice communication is about to come through, allowing them time to get the radio in operation. 

Tech Minds' video explains this in a bit more detail, and shows some examples of HF air comms with SELCAL tones played.

The post Listening to SELCAL and the HF Air Band with an RTL-SDR appeared first on rtl-sdr.com.

Radio For Everyone: Testing the RTL-SDR.com Triple Filtered ADS-B LNA, Amplified Coketenna

$
0
0

Akos, author of his blog 'Radio for Everyone' has recently reviewed our new RTL-SDR.com Triple Filtered ADS-B LNA. In the review he compares our ADS-B LNA against another external ADS-B LNA by Uputronics and against the FlightAware Prostick and Prostick+. The tests use the external LNA's plugged directly into the dongle in order to more fairly compare against the FlightAware dongles which have LNA's built in to the dongles themselves. From his results the RTL-SDR.com ADS-B LNA appears to have near identical results with the Uputronics LNA, and slightly better results compared to the FlightAware dongles. Akos has not yet tested the main use-case of the LNA, which is to use it at the end of a run of coax cable, however he plans to do this in a future test. Also in his second post Akos shows how to build a simple amplified Coketenna using our ADS-B LNA.

On the subject of ADS-B performance we note that there are two ways to set up a system for optimal reception (apart from the antenna). The first is to place the computing and radio devices (such as a Raspberry Pi and RTL-SDR) as close to the antenna as possible (leaving a ~1m coax run to avoid local interference from the Pi). For this type of setup it is cheaper to use a FlightAware Prostick Plus RTL-SDR dongle since this has an ADS-B LNA built into it. However, the disadvantage is that you may need to set up a Power over Ethernet system, or find a remote power source, and possibly place the Pi in a difficult to service location such as in an attic or up a mast.

The second option is to use an external ADS-B LNA close to the antenna, and run coax down to the computing device which is positioned in a more accessible location. The LNA will negate any losses in the coax cable, and with high enough gain on the LNA, using quality coax is not such a high requirement since those losses are negated by sufficient LNA gain. Both methods will yield similar excellent performance.

Tested ADS-B LNA's and ADS-B RTL-SDR Dongles

The post Radio For Everyone: Testing the RTL-SDR.com Triple Filtered ADS-B LNA, Amplified Coketenna appeared first on rtl-sdr.com.


PiAware Radar – A Traditional Radar-Like Display for ADS-B, and Setting up an ADS-B Cockpit Flight Display

$
0
0

PiAware Radar is a Python script that connects to your PiAware server and uses the received ADS-B data to display a familiar radar-like display (green circle with rotating radius, and aircraft displayed as blips). PiAware is the software used to take ADS-B data from an RTL-SDR dongle running on a Raspberry Pi and feed flightaware.com. A radar-like display is probably not very useful, but it could be used to set up an interesting display that might impress friends. Over on his blog IT9YBG has uploaded a tutorial that shows how to set PiAware Radar up on a Raspberry Pi.

Also on his blog IT9YBG has uploaded another tutorial that shows how to set up 1090XHSI, which is a program that displays an 737 aircraft cockpit simulation using live ADS-B data. The ADS-B data updates the instrument displays in real time, giving you a view of exactly what the pilots might be seeing on their dashboard of their aircraft. We posted about this software in the past, but IT9YBG's tutorial helps make it much easier to set up.

PiAware Radar
PiAware Radar
1090 XHSI 737 Cockpit Simulation from ADS-B Data

The post PiAware Radar – A Traditional Radar-Like Display for ADS-B, and Setting up an ADS-B Cockpit Flight Display appeared first on rtl-sdr.com.

Testing the Airspy with the New And Improved Version of ADSBSpy

$
0
0

Airspy have recently released an update to their ADSBspy decoder, which is an Airspy One/R2 compatible decoder for 1090 MHZ ADS-B signals. According to 'prog', the software developer of ADSBSpy, his setup can see almost double the number of aircraft and with fewer false positives when using the updated software. Prog writes that the secret to the improvement is some reworked DSP code that aims to exploit oversampling in the Airspy to the maximum.

We compared the new (1.0.0.38/39) decoder against the old decoder (1.0.0.37) which used to get similar performance to dump1090. The test setup was two Airspy dongles connected to a dipole antenna via a splitter, with our Triple Filtered ADS-B LNA used by the antenna. One Airspy was used to power the LNA via it's bias tee, and both units received the same amplified signal. We found indeed that the new version of ADSBSpy receives a good number more aircraft in our set up, and an increased number of ADS-B messages too.

It seems that most of the additionally received aircraft must be from extremely weak signals, because when looking in Virtual Radar Server the extra aircraft usually only show their ICAO and maybe altitude and speed until they get closer.

So far this software appears to provide the best performance on ADS-B that we've seen so far, so if you are using an Airspy for ADS-B tracking we'd like to hear results from anyone who upgrades.

The New ADS-B Spy Receives More Aircraft and Messages

The post Testing the Airspy with the New And Improved Version of ADSBSpy appeared first on rtl-sdr.com.

Tysonpower Reviews our Triple Filter ADS-B LNA

$
0
0

Thank you to YouTuber 'Tysonpower' who is known for making various RF related videos as he has recently reviewed our Triple Filtered ADS-B LNA on his blog and on YouTube. Note that his video is in German, but it contains English subtitles. In the review he compares our LNA against a more expensive ADS-B LNA and found that it performs just as good, if not better in some cases. 

Our ADS-B LNA uses a triple filter design, as well as a two stage LNA which aims to significantly cut out interference from out of band signals which could overload the LNA and/or SDR dongle. It also has a low noise figure and high output gain of 27dB which is great for reducing losses on long runs of coax cable. More information about our LNA on the release post, and it can be purchased from our store.

The post Tysonpower Reviews our Triple Filter ADS-B LNA appeared first on rtl-sdr.com.

Getting the V3 Bias Tee to Activate on PiAware ADS-B Images

$
0
0

A few owners of our RTL-SDR V3 and/or our Triple Filtered ADS-B LNA (or other bias tee powered LNAs) have been having trouble getting the V3 bias tee to activate on the FlightAware PiAware Raspberry Pi image. The core stumbling point is that the PiAware image activates the dump1090 ADS-B decoder immediately upon boot. To activate the bias tee, the bias tee software requires access to the dongle which it cannot get since dump1090 is blocking it. So to get around this the bias tee must be activated first before dump1090 runs.

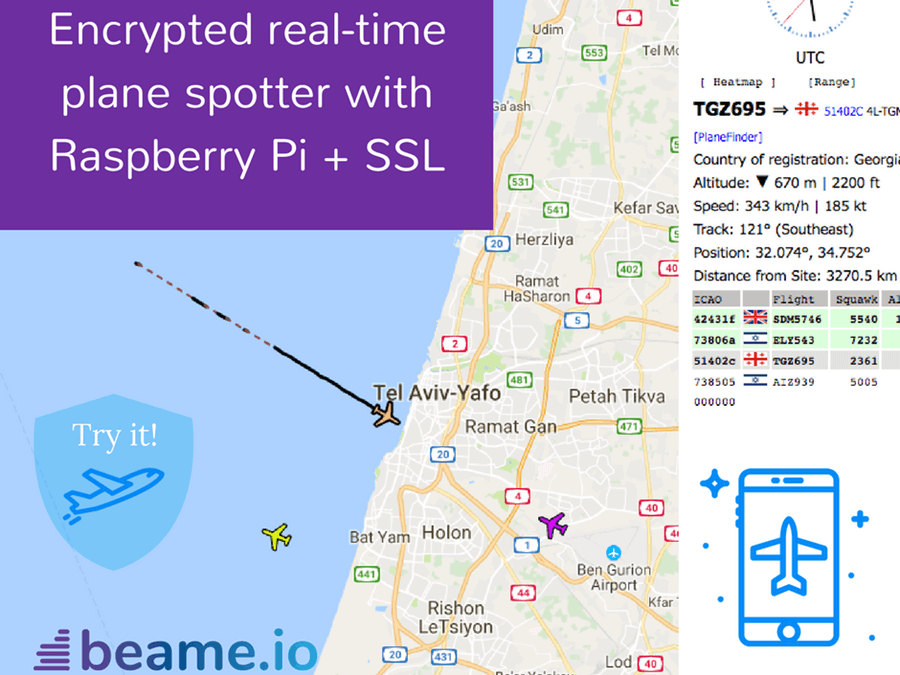
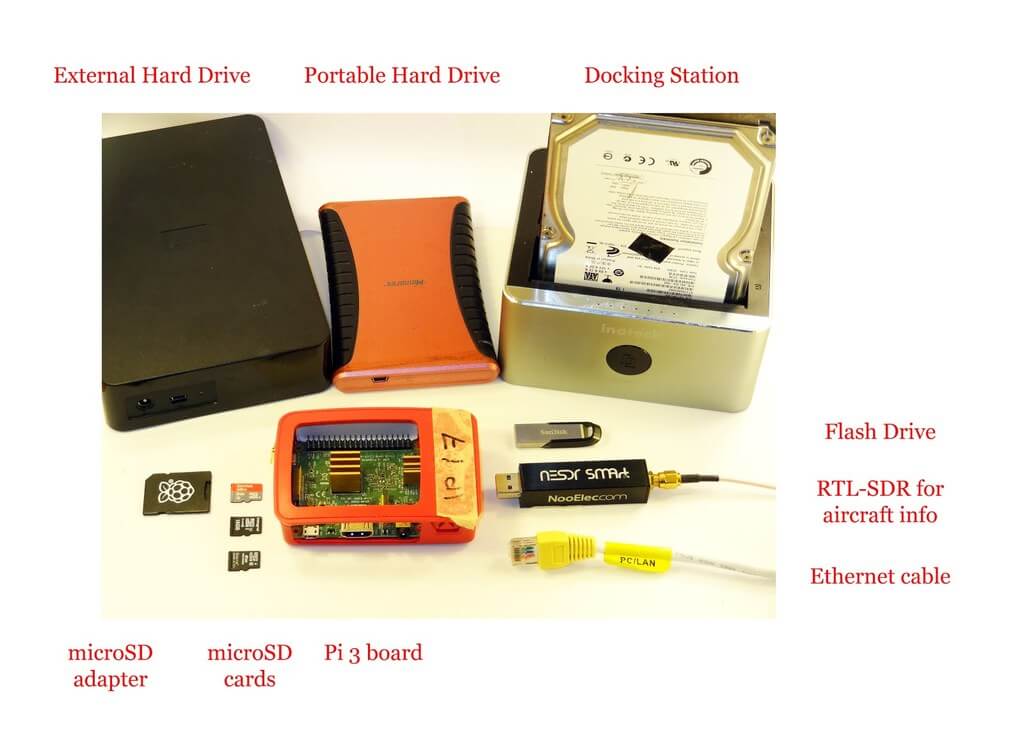
PiAware is FlightAware's Raspberry Pi image which feeds their flightaware.com flight tracking service using RTL-SDR dongles. By using our Triple Filtered ADS-B LNA, users can expect increased range and decoded messages, especially when using long runs of coax cable, and/or in environments with strong interfering signals.

In the instructions below we'll explain how to set up a PiAware image that automatically enables the Bias Tee upon boot.

Downloading the V3 Bias Tee Software onto PiAware

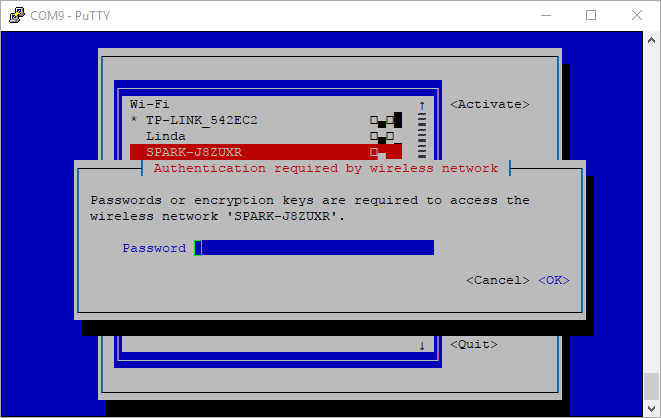
First we assume that you're starting fresh from a new PiAware image, so we need to enable WiFi and SSH connections which is part of the standard set up for PiAware. See the following links for instructions.

Enable WiFi via config file https://flightaware.com/adsb/piaware/build

Enable SSH by adding ssh file to boot https://flightaware.com/adsb/piaware/build/optional#password

 
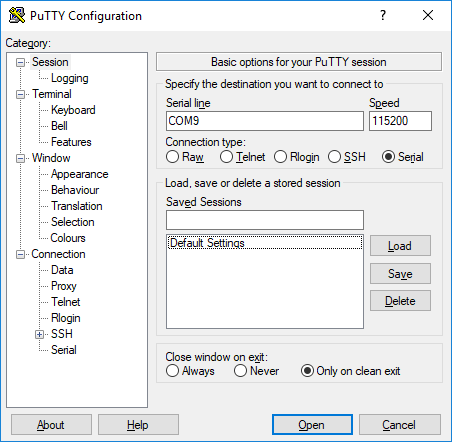
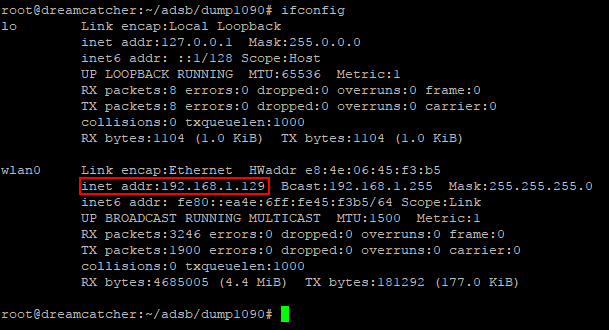
Now log in to your PiAware machine using SSH and PuTTY (or any other terminal software) using username "pi" and password "flightaware".

Run the following commands to update and install some dependencies. 

sudo apt-get update
sudo apt-get install git cmake build-essential libusb-1.0-0-dev

 
Download and install the RTL-SDR V3 Bias Tee software.

cd ~
git clone https://github.com/rtlsdrblog/rtl_biast
cd rtl_biast
mkdir build
cd build
cmake ..
make

Testing the Bias Tee

Over on his blog Akos has created a short guide to activating the bias tee manually, by first stopping dump1090, activating the bias tee, then restarting dump1090. It's a simple one line copy and paste job.

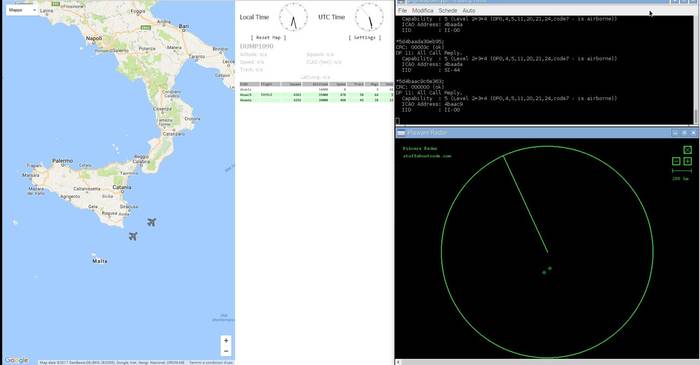
So after installing the rtl_biast software above you can use the following line to test the bias tee. After running this line the FlightAware service should be up and running again, with the bias tee and LNA activated.

sudo service dump1090-fa stop && cd ~/rtl_biast/build/src && ./rtl_biast -b 1 && sudo service dump1090-fa start

Automatically Starting the Bias Tee on Boot

Ideally we don't want to have to reactivate the bias tee manually every time the Raspberry Pi reboots. To make it automatic use the following instructions:

First create a service directory and configuration file

sudo mkdir /etc/systemd/system/dump1090-fa.service.d
sudo nano /etc/systemd/system/dump1090-fa.service.d/bias-t.conf

 
Then paste in the following

[Service]
ExecStartPre=/home/pi/rtl_biast/build/src/rtl_biast -b 1

 
Finally press Ctrl+X then Y to close and save. Now whenever PiAware reboots the bias tee should be automatically activated as this service runs before dump1090 is activated.

Credits:

Thanks to the discussion on the FlightAware forums and in particular user 'obj' for originally finding this automatic solution.

The post Getting the V3 Bias Tee to Activate on PiAware ADS-B Images appeared first on rtl-sdr.com.

Tracking Planes with RTL-SDR, Apache Kafka, KSQL, Kibana and a Raspberry Pi

$
0
0

Inspired by a low flying aircraft that kept waking his cat in the morning, Simon Aubury decided to use an RTL-SDR and ADS-B tracking software dump1090 to determine which plane was the culprit. This is all now standard stuff, however, Simon's software implementation and management of the received ADS-B data is quite unique, as he uses Apache Kafka, KSQL and Kibana as his tools for processing and visualizing the ADS-B data.

Apache Kafka is a 'distributed streaming platform', and KSQL enables real time processing of the data from Kafka. Kibana is a data visualization tool. Essentially these technologies are just ways to manage, process and digest in a human readable way large amounts of real time data coming into a database.

So with some clever database coding Simon was able to create a constantly updating dashboard in Kibana that plots aircraft positional heat maps, displays data such as spotted airlines and destination frequencies in a text cloud, and displays aircraft height data in a line graph. Finally using a database lookup and his gathered data Simon was able to determine that an A380 aircraft flying over his house was waking his cat in the morning.

The post Tracking Planes with RTL-SDR, Apache Kafka, KSQL, Kibana and a Raspberry Pi appeared first on rtl-sdr.com.

Viewing all 186 articles
Browse latest View live